Submitting Apk to Google Play Results in Upload Failed Your Changes Not Saved
This browser is no longer supported.
Upgrade to Microsoft Border to take advantage of the latest features, security updates, and technical support.
Publishing to Google Play
Although at that place are many app markets for distributing an application, Google Play is arguably the largest and near visited store in the world for Android apps. Google Play provides a single platform for distributing, advertising, selling, and analyzing the sales of an Android awarding.
This section volition cover topics that are specific to Google Play, such as registering to become a publisher, gathering assets to help Google Play promote and annunciate your application, guidelines for rating your application on Google Play, and using filters to restrict the deployment of an awarding to sure devices.
Requirements
To distribute an application through Google Play, a programmer account must be created. This only needs to be performed one time, and does involve a 1 fourth dimension fee of $25 USD.
All applications need to be signed with a cryptographic key that expires after October 22, 2033.
The maximum size for an APK published on Google Play is 100MB. If an application exceeds that size, Google Play volition allow extra avails to exist delivered through APK Expansion Files. Android Expansion files allow the APK to take 2 additional files, each of them upwards to 2GB in size. Google Play will host and distribute these files at no toll. Expansion files will exist discussed in another section.
Google Play is not globally available. Some locations may not be supported for the distribution of applications.
Becoming a Publisher
To publish applications on Google play, it is necessary to have a publisher account. To sign up for a publisher account follow these steps:
- Visit the Google Play Developer Console.
- Enter bones information about your developer identity.
- Read and accept the Developer Distribution Agreement for your locale.
- Pay the $25 USD registration fee.
- Ostend verification by electronic mail.
- Later the account has been created, it is possible to publish applications using Google Play.
Google Play does not support all countries in the world. The most up-to-date lists of countries tin be found in the following links:
-
Supported Locations for Developer & Merchant Registration – This is a list of all countries where developers may register as merchants and sell paid applications.
-
Supported Locations for distribution to Google Play users – This is a listing of all countries where applications may exist distributed.
Preparing Promotional Assets
To effectively promote and annunciate an application on Google Play, Google allows developers to submit promotional assets such every bit screenshots, graphics, and video to exist submitted. Google Play will then utilise those assets to advertise and promote the application.
Launcher Icons
A launcher icon is a graphic that represents an application. Each launcher icon should be a 32-chip PNG with an alpha channel for transparency. An application should have icons for all of the generalized screen densities as outlined in the list below:
- ldpi (120dpi) – 36 ten 36 px
- mdpi (160dpi) – 48 x 48 px
- hdpi (240dpi) – 72 x 72 px
- xhdpi (320dpi) – 96 x 96 px
Launcher icons are the first things that a user will run across of applications on Google Play, so care should exist taken to brand the launcher icons visually appealing and meaningful.
Tips for Launcher Icons:
-
Uncomplicated and uncluttered– Launcher icons should be kept simple and uncluttered. This means excluding the name of the awarding from the icon. Simpler icons will be more memorable, and will be easier to distinguish at the smaller sizes.
-
Icons should not be thin– Overly thin icons volition not stand out well on all backgrounds.
-
Apply the alpha channel– Icons should make use of the alpha channel, and should non exist full-framed images.
High Resolution Awarding Icons
Applications on Google Play require a high fidelity version of the awarding icon. Information technology is only used by Google Play, and does not supervene upon the awarding launcher icon. The specifications for the high-resolution icon are:
- 32-bit PNG with an alpha channel
- 512 ten 512 pixels
- Maximum size of 1024KB
The Android Asset Studio is a helpful tool for creating suitable launcher icons and the high-resolution awarding icon.
Screenshots
Google play requires a minimum of 2 and a maximum of 8 screenshots for an application. They volition be displayed on an awarding's details page in Google Play.
The specs for screenshots are:
- 24 fleck PNG or JPG with no alpha aqueduct
- 320w ten 480h or 480w x 800h or 480w x 854h. Landscaped images will be cropped.
Promotional Graphic
This is an optional paradigm used past Google Play:
- It is a 180w 10 120h 24 scrap PNG or JPG with no alpha aqueduct.
- No border in fine art.
Feature Graphic
Used by the featured department of Google Play. This graphic may be displayed alone without an application icon.
- 1024w 10 500h PNG or JPG with no alpha channel and no transparency.
- All of the important content should be within a frame of 924x500. Pixels outside of this frame may be cropped for stylistic purposes.
- This graphic may be scaled downwards: utilise large text and keep graphics simple.
Video Link
This is a URL to a YouTube video showcasing the application. The video should be 30 seconds to 2 minutes in length and showcase the best parts of your application.
Publishing to Google Play
- Visual Studio
- Visual Studio for Mac
Xamarin Android seven.0 introduces an integrated workflow for publishing apps to Google Play from Visual Studio. If y'all are using a version of Xamarin Android earlier than seven.0, you lot must manually upload your APK via the Google Play Developer Console. Also, you must have at to the lowest degree one APK already uploaded earlier you tin employ the integrated workflow. If yous have non still uploaded your first APK, you must upload it manually. For more than information, come across Manually Uploading the APK.
Creating a New Certificate, explained how to create a new document for signing Android apps. The next stride is to publish a signed app to Google Play:
- Sign into your Google Play Developer business relationship to create a new project that is linked to your Google Play Developer business relationship.
- Create an OAuth Client that authenticates your app.
- Enter the resulting Customer ID and Client underground into Visual Studio.
- Annals your business relationship with Visual Studio.
- Sign the app with your certificate.
- Publish your signed app to Google Play.
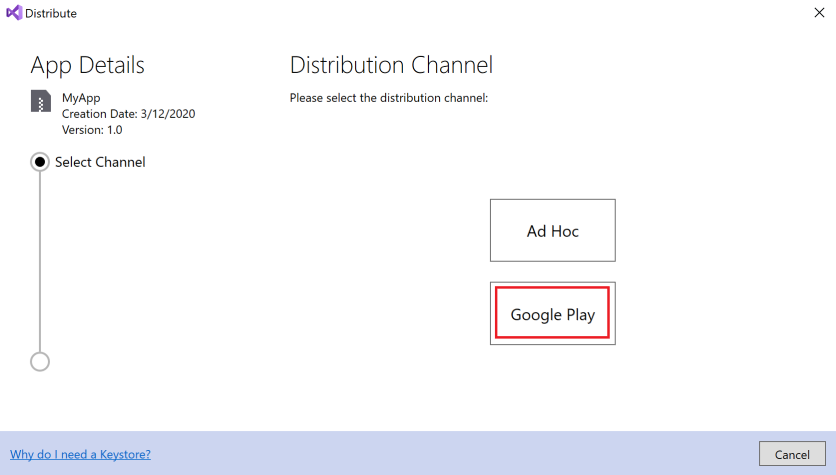
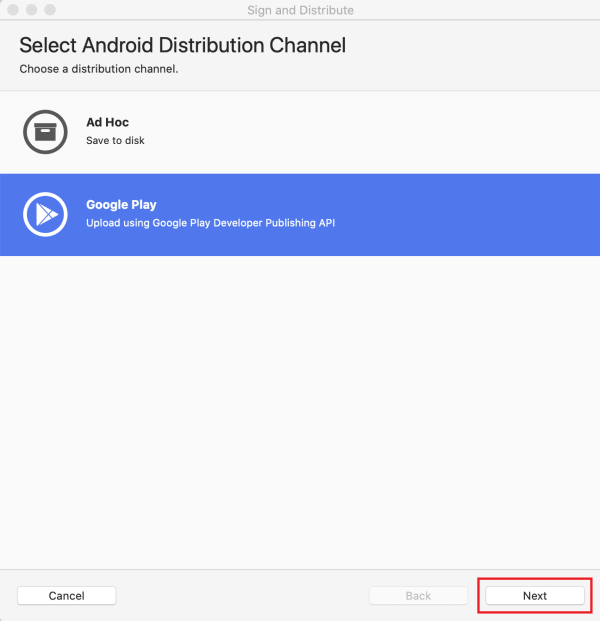
In Archive for Publishing, the Distribution Channel dialog presented two choices for distribution: Ad Hoc and Google Play. If the Signing Identity dialog is displayed instead, click Back to return to the Distribution Channel dialog. Select Google Play:
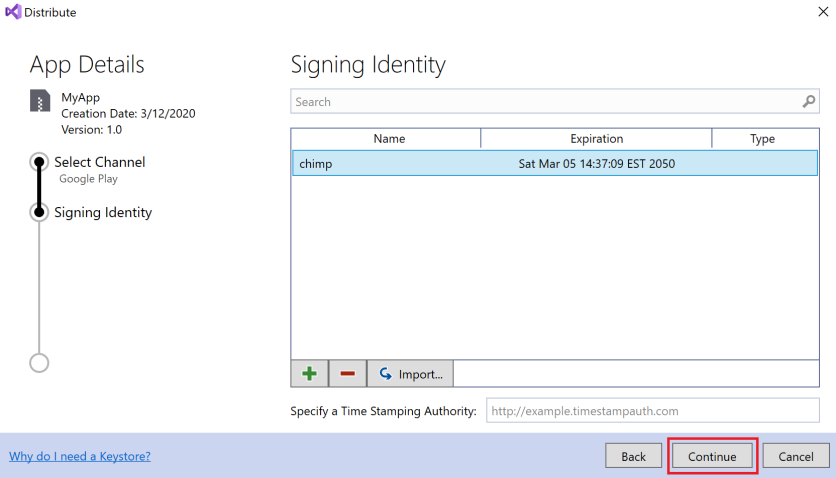
In the Signing Identity dialog, select the identity created in Creating a New Certificate and click Continue:
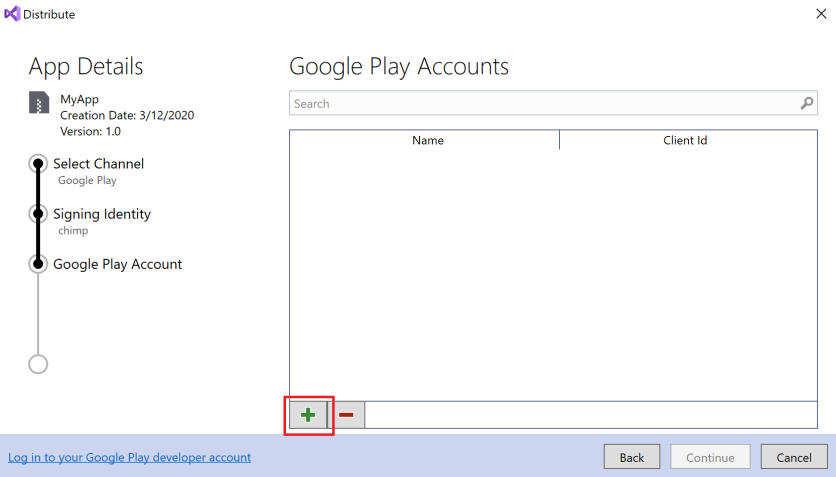
In the Google Play Accounts dialog, click the + push button to add a new Google Play Business relationship:
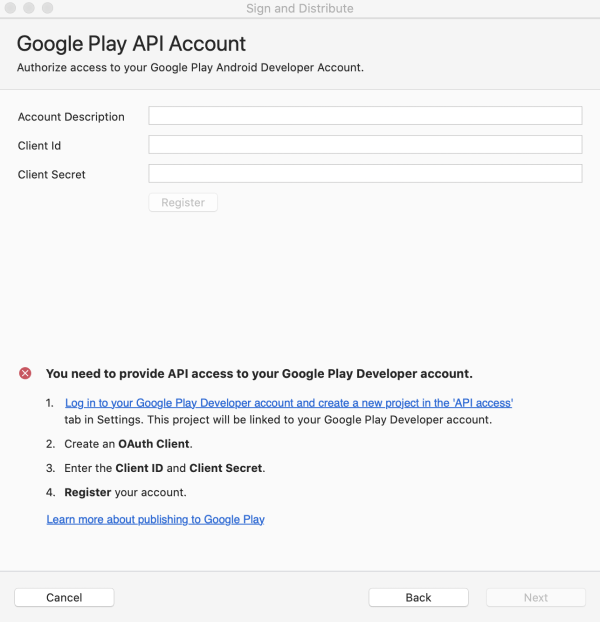
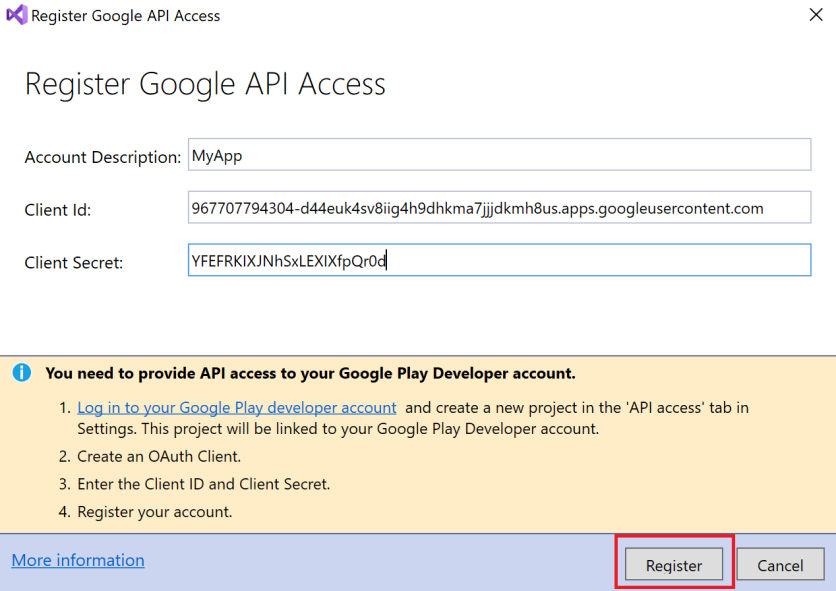
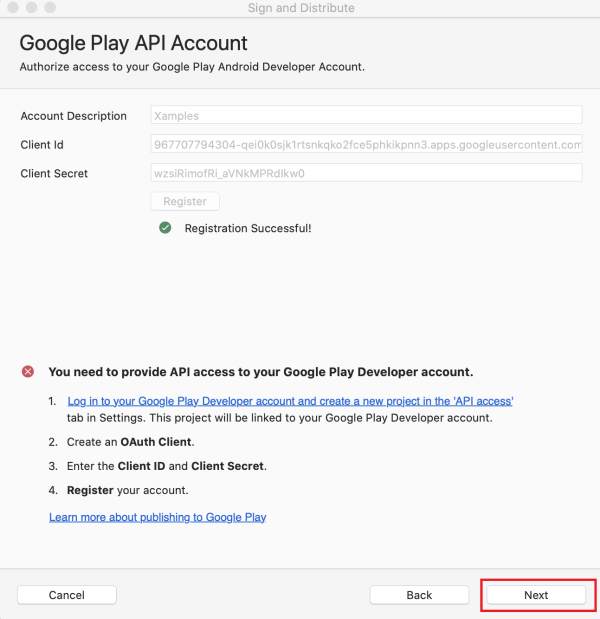
In the Annals Google API Admission dialog, you must provide the Client ID and Client hole-and-corner that provides API access to your Google Play Programmer business relationship:
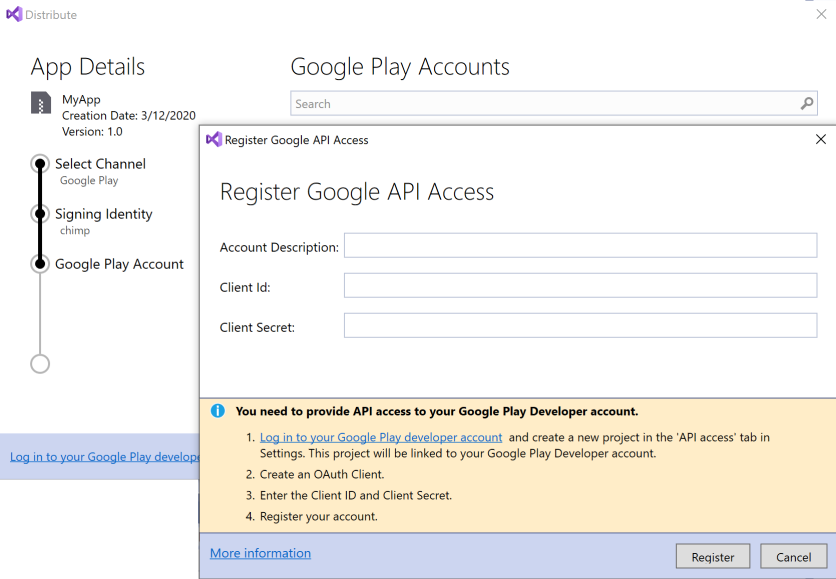
The next section explains how to create a new Google API project and generate the needed Client ID and Client hush-hush.
Create a Google API Project
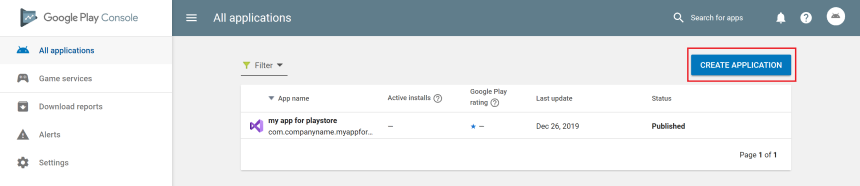
First, sign into your Google Play Developer account. If you exercise non already have a Google Play Developer account, run into Get Started with Publishing. Besides, the Google Play Programmer API Getting Started explains how to use the Google Play Developer API. Afterward y'all sign into the Google Play Developer Console, click CREATE Application:
Afterwards creating the new project, it will be linked to your Google Play Developer Console business relationship.
The next step is to create an OAuth Client for the app (if one has not already been created). When users request access to their individual data using your app, your OAuth Client ID is used to authenticate your app.
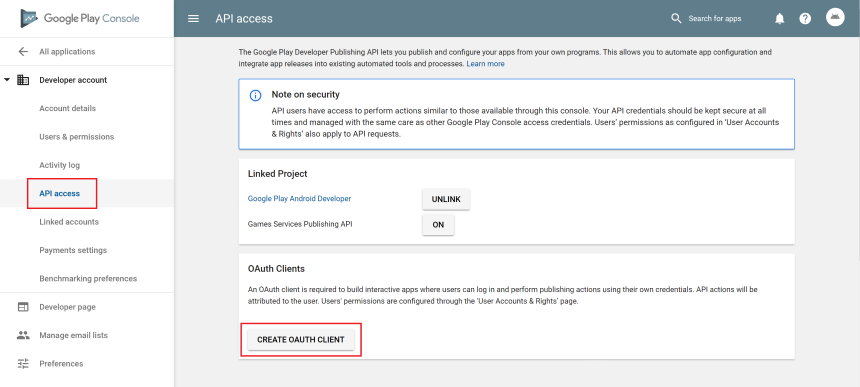
Go to the Settings page.
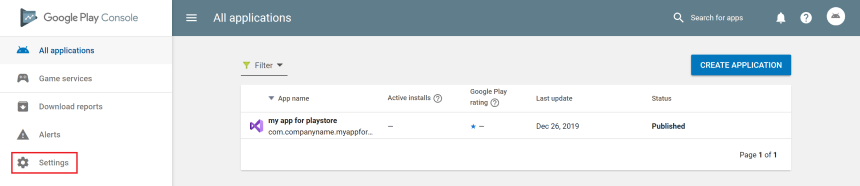
In the Settings page, select API access and click CREATE OAUTH Client to create a new OAuth client:
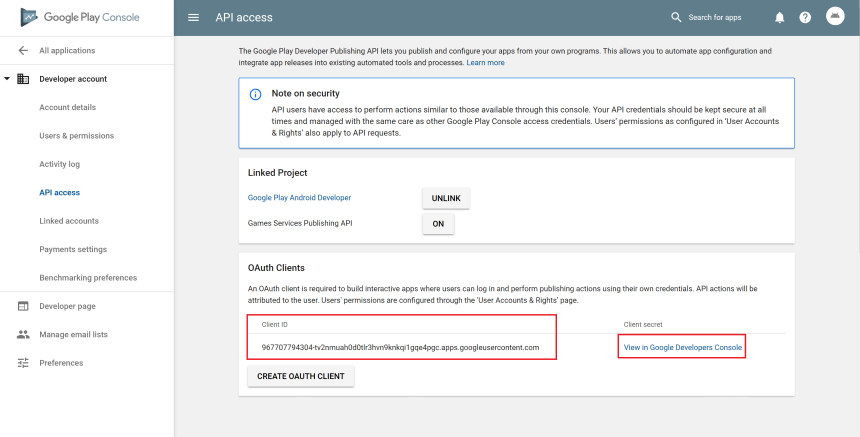
Later a few seconds, a new Client ID is generated. Click View in Google Developers Console to see your new Customer ID in the Google Developer's Console:
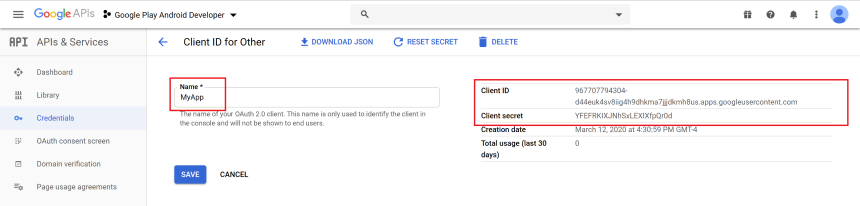
The Client ID is displayed forth its proper name and creation date. Click the Edit OAuth Client icon to view the Client hole-and-corner for your app:

The default name of the OAuth client is Google Play Android Developer. This can be changed to the name of Xamarin.Android app, or any suitable name. In this example, the OAuth Client proper noun is changed to the proper noun of the app, MyApp:
Click Save to salvage changes. This returns to the Credentials page where to download the credentials past clicking on the Download JSON icon:
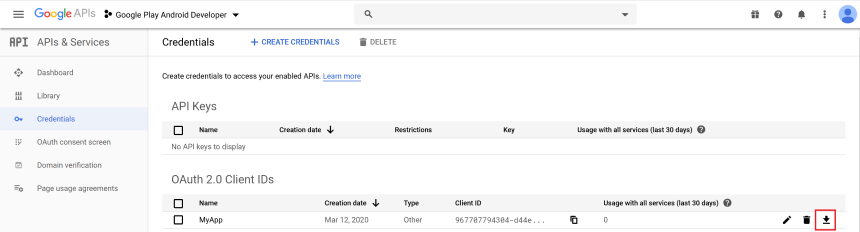
This JSON file contains the Client ID and Client surreptitious that you can cut and paste into the Sign and Distribute dialog in the next step.
Register Google API Access
- Visual Studio
- Visual Studio for Mac
Utilize the Client ID and Client secret to complete the Google Play API Account dialog in Visual Studio for Mac. It is possible to give the business relationship a clarification – this makes information technology possible to annals more than one Google Play account and upload futurity APK'south to different Google Play accounts. Re-create the Client ID and Client secret to this dialog and click Register:
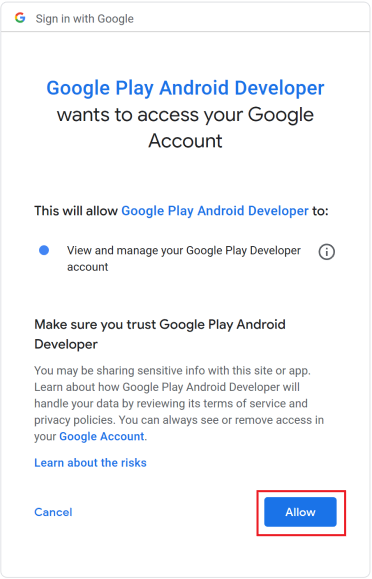
A spider web browser will open up and prompt you to sign into your Google Play Android Developer account (if you are not already signed in). After yous sign in, the following prompt is displayed in the web browser. Click Allow to authorize the app:
Publish
Subsequently clicking Allow, the browser reports Received verification code. Closing... and the app is added to the listing of Google Play Accounts in Visual Studio. In the Google Play Accounts dialog, click Proceed:

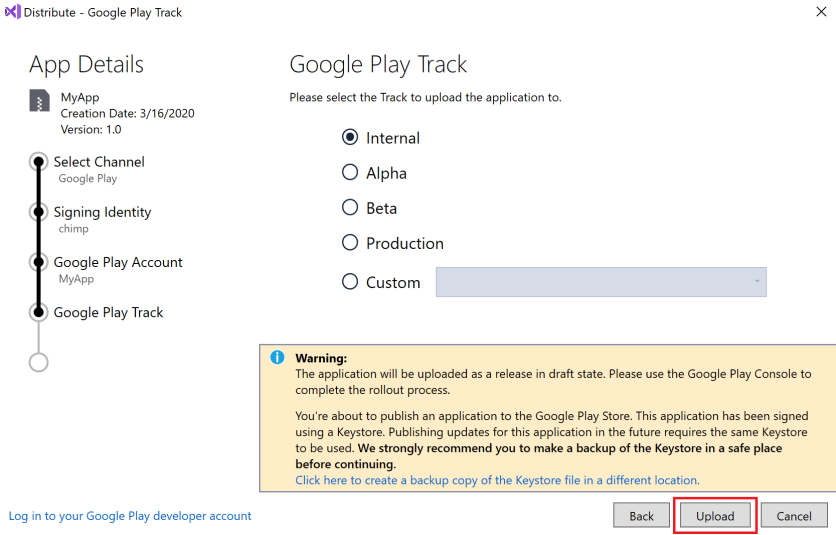
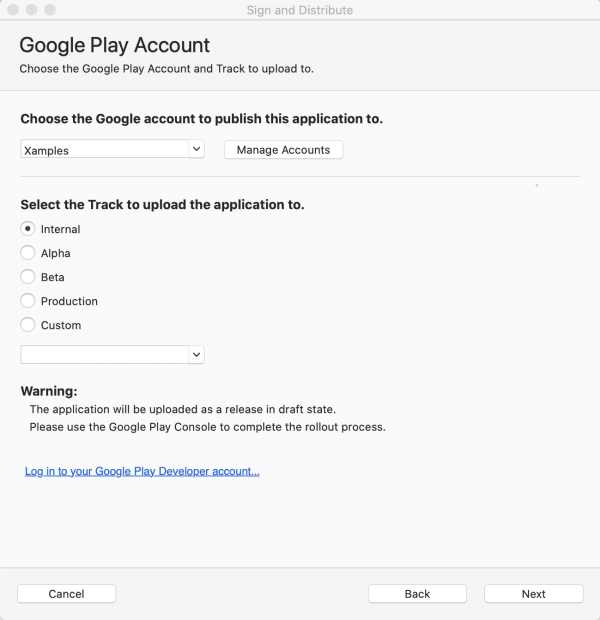
Next, the Google Play Rails dialog is presented. Google Play offers five possible tracks for uploading your app:
- Internal – Used for chop-chop distributing your app for internal testing and quality assurance checks.
- Alpha – Used for uploading an early version of your app to a small list of testers.
- Beta – Used for uploading an early version of your app to a larger list of testers.
- Production – Used for full distribution to the Google Play shop.
- Custom – Used for testing pre-release versions of your app with specific users by creating a listing of testers past email address.
Choose which Google Play track will exist used for uploading the app and click Upload.
For more than data near Google Play testing, encounter Ready open/closed/internal tests.
Next, a dialog is presented to enter the countersign for the signing document. Enter the password and click OK:

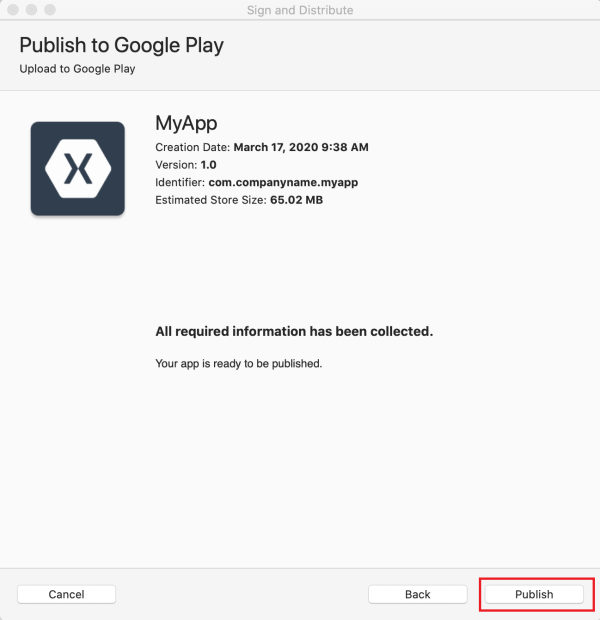
The Archive Managing director displays the progress of the upload:
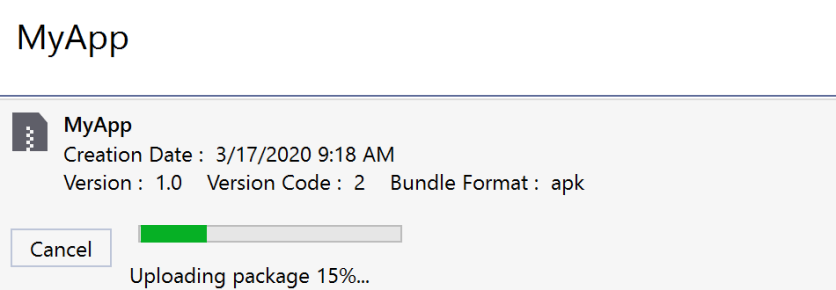
When the upload finishes, completion status is shown in the lower left hand corner of Visual Studio:

Troubleshooting
If yous do non see your custom rail when selecting a Google Play track, make sure you accept created a release for that runway on the Google Play Developer Console. For instructions on how to create a release, run into Ready & roll out releases.
Note that 1 APK must accept already been submitted to the Google Play store before the Publish to Google Play will piece of work. If an APK is not already uploaded the Publishing Wizard volition display the post-obit fault in the Errors pane:

When this error occurs, manually upload an APK (such as an Advert Hoc build) via the Google Play Programmer Console and use the Distribution Channel dialog for subsequent APK updates. For more data, see Manually Uploading the APK. The version code of the APK must change with each upload, otherwise the post-obit mistake will occur:

To resolve this error, rebuild the app with a different version number and resubmit information technology to Google Play via the Distribution Channel dialog.


williamsonanstely.blogspot.com
Source: https://docs.microsoft.com/en-us/xamarin/android/deploy-test/publishing/publishing-to-google-play/
0 Response to "Submitting Apk to Google Play Results in Upload Failed Your Changes Not Saved"
Post a Comment